

The novelty of having a farmstand had long been on my mind, as the perfect culmination of loving to cook and garden, and seeing a need for local produce and good food made with love. The delta region in Southeast Arkansas is rural and the economy depends on farming, but those crops are almost exclusively sold to go elsewhere. One day there came the perfect storm of having some materials and a very prolific garden at the same time, and it was decided that it was time to make it happen.
Call it broke kid mentality, or financially responsible, even now as a more financially stable adult than I was in younger years, doing things as cost effectively as possible is important and fun for me. When I was managing an airstrip, the products we used came on pallets and they stacked up over the course of the season. This gave me an abundance of available free lumber of varying quality, and in my mind, despite the ridiculous amount of manual labor it would take to get enough usable wood from the pallets, that was the most cost effective way to go for most small build ideas I’d periodically come up with. All of this to say, I had pallets laying around that were available for use on the farmstand.
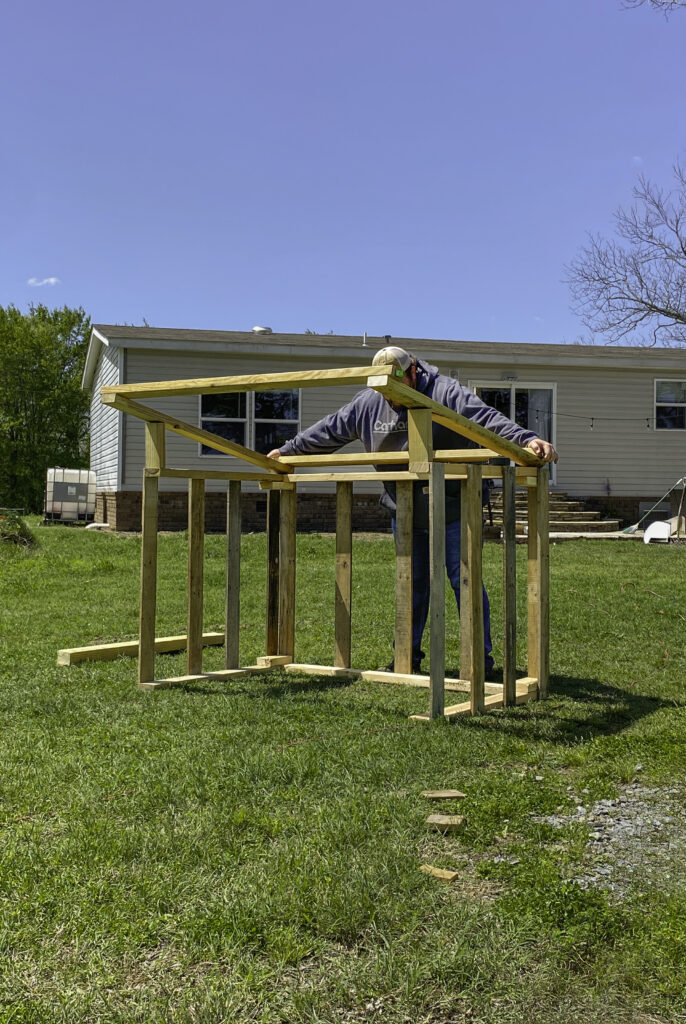
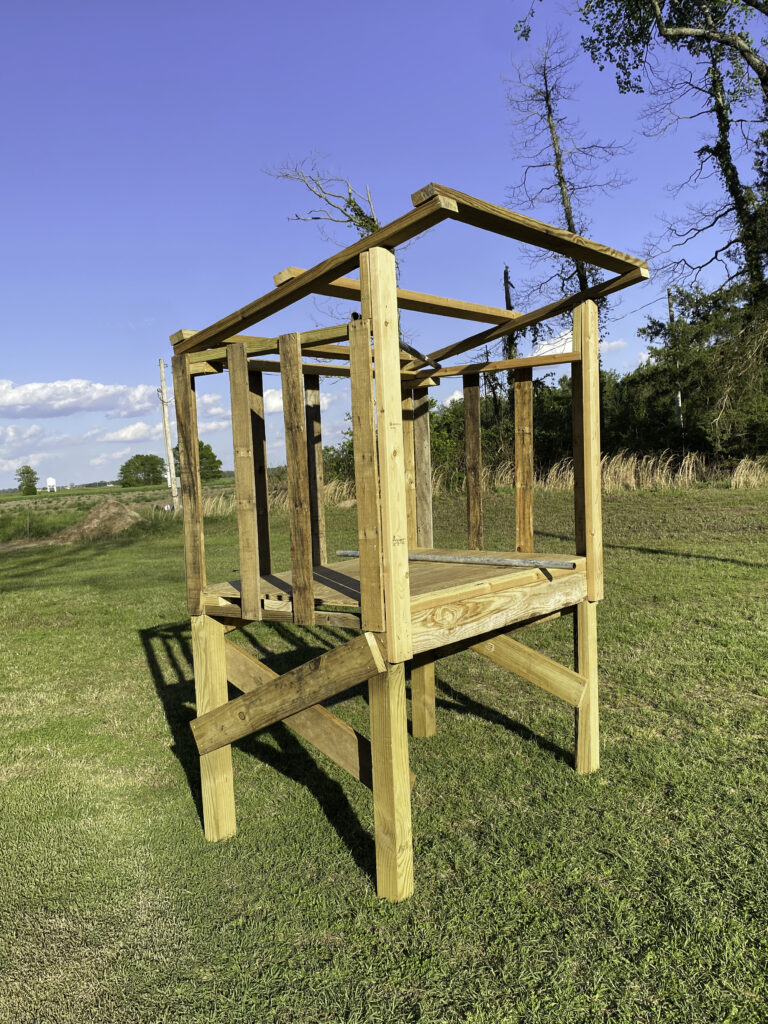
In addition to pallet wood, we needed wood to frame it up, which we also had some of from other projects including some 4×4’s (for the legs) from an outdoor lighting project, and plywood (for the “floor” of the farmstand) from a kitchen floor repair. A good old country farmstand isn’t complete without some tin, and that came from a farmer friend of ours who had a shop that he didn’t really use because the roof was on the ground, which wasn’t ideal for him, but for us looking for rusted tin, it was perfect (and free). What we did have to buy was four 2×4’s, 10’ length and some screws. That all came out to about $75 or so, and we did have some lumber left over.
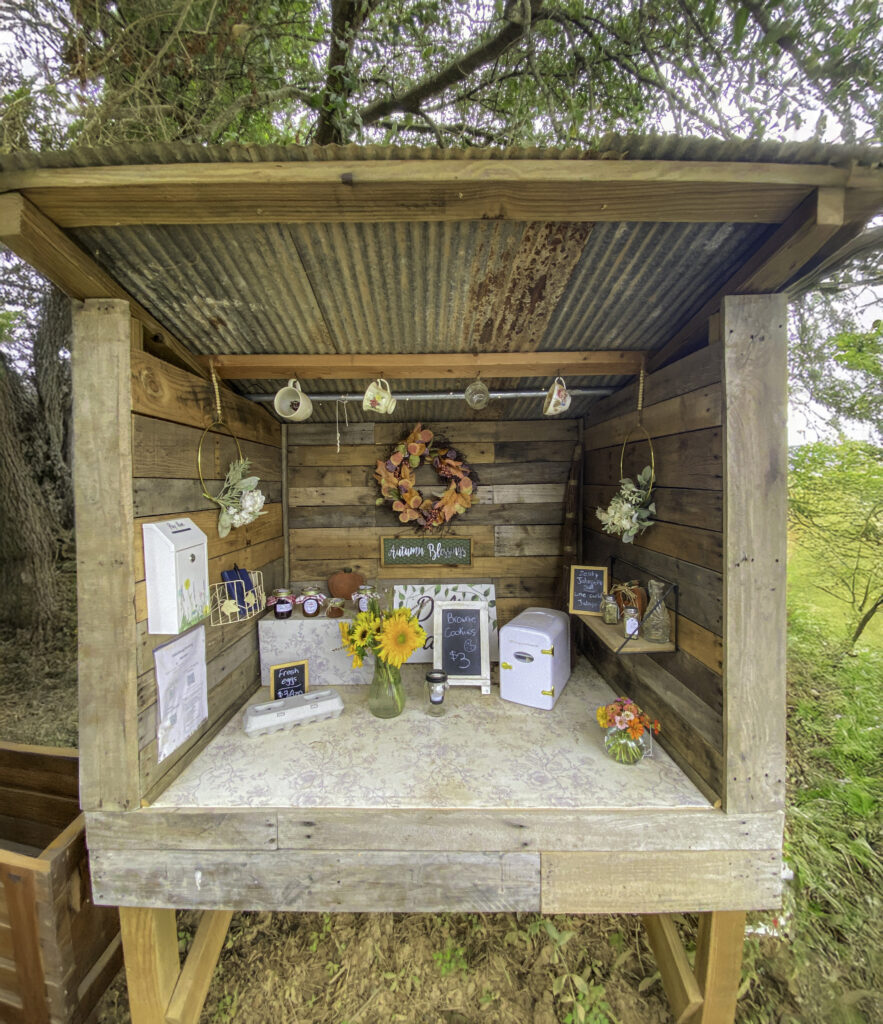
As far as building it goes, what I wanted was a rustic feel that people could just walk up to, but otherwise, absolutely no plans. John likes to build things, and I like to micro-manage and it all works out with almost minimal cussing. I can’t explain too much how we built it; John asked me about how tall I wanted it, and he made it about the height I held my hand at. John asked me how wide I wanted it, and he made it about the distance I held my arms out. When he needed me to crawl into it to measure or screw boards in, I did.
When everything was screwed together and I stepped back to look at it, I was so happy. I had wanted it for so long and I finally had a farmstand. It was also very sturdy. I would like to stress again, we are not carpenters, but we built this at the end of tornado season and it has done cartwheels and never came apart. Actual cartwheels. One time we woke up and it was upside down in another part of the yard, but we just flipped ‘er back up and went about our day. What I’m getting at here is that it is totally doable by yourself, to build a sturdy farmstand you are proud of. If you wanted to plan it out a little, it could probably help. If not, just toss a few extra screws in there.
Hard Learned Tips for Your Farmstand Build
I’m not going to say building was seamless, and you live, learn, and move on, but now you can live and learn through me! Here are a five tips or things to think about with your build:
- If the “floor” or bottom of the farmstand is going to be off the ground, keep in mind people are going to have to bend over and reach for the awesome stuff you put in there. If it is too wide front to back, it can be tricky to reach the back or shelves that may be back there. Mine ended up being a touch wider than was just super easy to reach the back of, but I am also 5’4” so if you were of an average height, it probably would’ve been fine.
- This thing is going to be out in the elements. I had to shut my farmstand down when it rained because it was open-faced and in Arkansas, it rains sideways just as often as it rains down. I also fought with ants and birds, which is something to factor in.
- Don’t underestimate some concrete! After a number of times seeing my farmstand do gymnastics, I realized the only way to win the fight against wind was concrete. We dug holes with clam shells (post hole diggers) about 8” deep, and placed each of the legs of the farmstand in a hole. I bought four sacks of Quikrete, but only needed 2 and they were about $5 each, which is very worth it for a stationary farmstand.
- When you are building, if you do decide to use wood from pallets, keep in mind that wood can be brittle and split easily. You can try drilling a small pilot hole before screwing, or what we did is use small finishing nails to nail them to the frame to make the inner walls of the farmstand and it worked just fine. I know that after sweating and spending a bunch of time getting pallet boards off in one piece, it can about push you over the edge when you go to use it in your build and it splits and breaks.
- When pulling pallets apart, if they are wet or damp, it can help the boards pull off without splitting.
Conclusion
Building a farmstand is very possible. I know the dollar figures of lumber and hardware can feel like a wall, and I understand we were kind of lucky with having some of that on hand, but don’t be afraid of some manual labor to get the job done. It is far more rewarding.
Get creative with sourcing materials! I love finding junk piles with old furniture etc that I can find pieces and parts to complete projects, there’s no shame in that! We added a bar to hang things on (old electrical conduit) and some fabric for the base of the farmstand to tie it all together (table cloth with a cute pattern). So good luck building, and don’t be afraid to just start and see where it takes you.